
 Has A Hump
To a beginner, the world of baking can seem intimidating. And to the seasoned baker, it can sometimes pose frustrating challenges. It’s during times like these that a thorough knowledge of the basics goes a long way in ensuring your product is perfect. Coming to your aid, is our very own Chef Avin, who shares his expertise on the most common cooking mishaps in a Pâtisserie, and gives you simple tips to ensure you create the perfect product. Starting off the classes is a crash course on Cake Faults. The Ideal Cake Cakes are arguably the most popular food product to bake, and are also extremely varied. So, you can’t really term any cake as the ideal one. The types range from sponge cakes, which are judged based on their lightness, to other kinds that are measured in terms of complexity. A common misconception a lot of people have today is assuming sponges are complete cakes by themselves. In my opinion, they are only a base for a finished cake. A lot more goes into making a complete cake. Similarly, most faults that occur in cake baking are either due to inadequate information or lack of experience. My experience in the field has taught me that some faults are more common than others source from Chef Avin/ LAVONNE 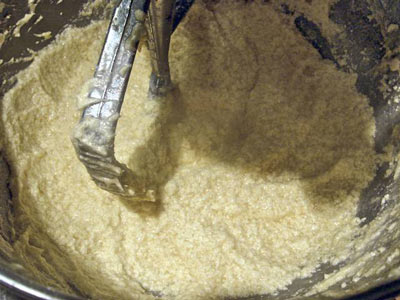 Fault # 1 - Batter curdling This is a problem commonly faced by beginners. Normally, this occurs because some sort of change takes place while mixing the ingredients. This change is caused when the ingredients are either too cold or too warm. The result is curdling. Possible reasons There are three possible reasons for this. The first being, not all the ingredients are of the same temperature. There are some ingredients that are cold, while some are warm. The second reason could be that the fat content in the butter is on the higher side. The third possibility is that the fat is not creamed properly. If the butter and sugar are inadequately creamed and any liquid is added, the batter curdles. Chef’s Tip When I am creaming, I add a portion of flour into the mixture. The flour takes out all the moisture and water content, and this ensures curdling does not take place. Another solution is to simply ensure that all ingredients are of the same temperature. Sometimes, people take the eggs straight out of the refrigerator and add it to the batter. They should allow it to thaw, reach room temperature and only then use it. And in the initial stages, stick to using the correct ingredients. Don’t get carried away with using fancy ones until you've perfected the process. Fault # 2 - Low volume In India, we use one flour for making everything. If you use the same flour across products, for example bread flour for cake baking, you’re likely to face this problem. Possible reasons Bread flour has a higher amount of gluten, and is too strong for cake baking. It is better to use a weaker flour that is more suited for cakes. If it’s not the flour, it could be the baking powder or soda, commonly referred to as leavening. Taken straight from the fridge, the leavening agent is still cold, and this also causes low volume. The third possible reason for this fault could be under whipping of the eggs. And if it’s none of those, it could also mean that the oven is too hot—normally cakes are baked at 160-190 degrees. Any higher than that, the protein coagulates too fast and the resulting cake is low on volume. Chef’s Tip Always use fresh ingredients, that are at room temperature. I can’t stress the importance of this enough. Further, eggs should be whipped in a manner that allows air to get incorporated into the mixture. Inexperienced bakers sometimes fold it too much, and as a result the mixture loses air. Always use the correct mixing method. Additionally, make sure the oven is at the right temperature before baking. 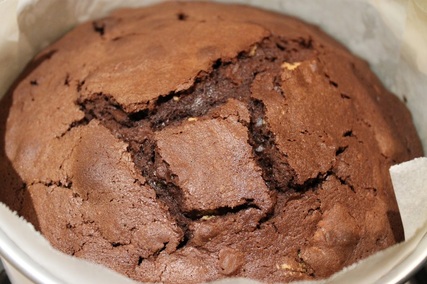 Fault # 3 Cracked Top/ Crust Burst This usually happens right at the end of the baking process, and sometimes it simply means that the cake is completely cooked. So it’s not always a bad thing. However, it does pose a problem in terms of finished appearance. Possible Reasons The main reason this happens is too much flour being added to the mix. Baking is a science and every recipe is standardised. It needs to be followed or modified based on the kind of cake being made. Sometimes, the liquid content or moisture in the mixture is too less, and that’s why it cracks. Other times, the oven ends up being non-idicative of actual temperatures. That is to say, it might be showing a particular temperature in the readings, but the inside could be a lot hotter. Chef’s Tip Experiment! Keep trying things out and learn to adjust the formula. Also, weigh your ingredients carefully. With practice, you’ll get a much better idea of how to balance your ingredients. Another key trick is to know your equipment well. Keep practicing until you gain a good idea of the perfect temperature for your oven. 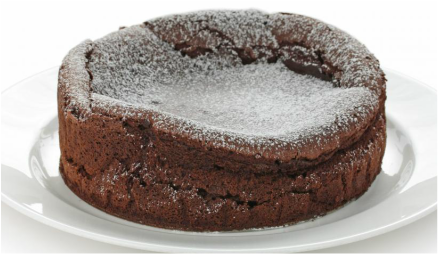 Fault #4 - Sinking Cake This is perhaps the most common cake fault, and happens right at the end of the baking process. Your cake is done and as you’re taking it out of the oven, it just sinks. This is called the V Fault, and happens because the internal structure of the cake is weak. Possible Reasons The V Fault usually occurs when the sugar level is too high or the fat in the butter is too much for the flour to hold. The gluten in the flour is unable to hold up, and as a result, the cake sinks. Chef’s Tip Adjust the formula. Make sure you’re putting the right amount of each ingredient in. This might also happen when you take the cake out too early. So before you do, take a knife or a toothpick and stick it into the cake. If the cake is properly cooked, it should come out clean. If the knife/toothpick come out coated, you need to allow it to bake longer. The Bundt Thermometer is used for this purpose, but knives and toothpicks are a more commonly available option. 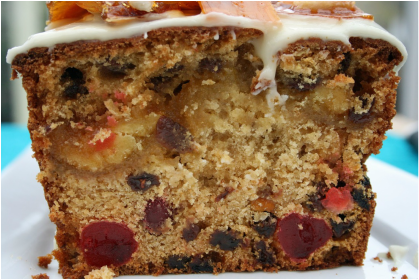 Fault # 5 Very Dense Cake This refers to when the resulting cake ends up being extremely thick. And multiple reasons can cause this. Possible Reasons The first one could be too much of baking powder or soda in the mix, which means the leavening is on the higher side. Additionally, it could also be a high fat or liquid content. Both in excess result in dense cakes. The third reason, and the most common, is that the oven is not heated to the right temperature for baking and is too cool. The fourth reason, usually in the case of inexperienced bakers, could be improper mixing. In our eagerness, we sometimes overdo the mixing and remove all the air from the mixture, resulting in this denseness. Chef’s Tip This tip keeps recurring, and comes with practice—adjust the formula. Apart from that, while creaming the fat or the eggs / sugar and curd with butter, make sure to fold them properly, without overdoing or under-doing it. This of course, comes with experience, so keep at it! Fault # 6 Poor flavour Sometimes, even when you’ve done everything you need to do, and the cake turns out great, the final taste is anything but perfect. Possible Reasons The most obvious—the ingredients being used are bad. In other cases, the baker sometimes uses a mix of ingredients to create a melange of flavours, but ends up using flavours that are incompatible with each other. Like while orange goes great with chocolate, adding the same flavour to white chocolate can cause a mess. Another not-so-common, but possible reason, could be an unclean baking pan. Chef’s Tip Make sure you use good quality ingredients. There is no substitute for this. Also, when in the initial stages of baking, don’t get too carried away with trying exotic flavours and combinations. Get the basics in place before experimenting. In the case of unclean pans, sometimes leftover oils from earlier greasing goes rancid and ends up affecting the flavour of the freshly baked cake. Ensure that all equipment you use is cleaned and stored hygienically. 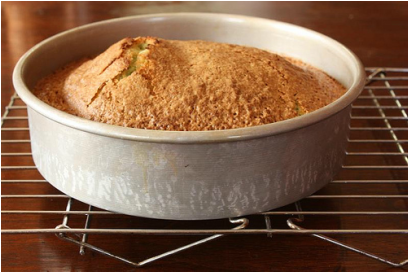 Fault # 7 - Uneven Shape The uneven end result, also known as the S Fault, is another common occurrence in cake baking. Possible reasons Here, there are four possible culprits—either the butter incorporated does not have an even distribution of fat, the spreading of the batter in the pan is uneven, the rack inside the oven is not even or the temperature inside is uneven. With the oven, sometimes the thermostat is faulty, and one side can be a different temperature than the other. Chef’s Tip Incorporate the fat correctly into your recipe. By now you can see how important getting the formula right is. Most faults are caused by that alone. Also, spread the batter evenly and make sure the oven temperature is adjusted correctly 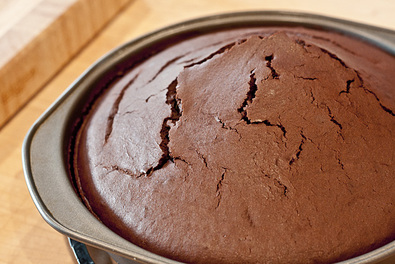 Fault # 9 Peaked tops The cake looks fine, the volume is right, but the top ends up rising a bit too much, giving a disproportionate appearance. Possible Reasons Too much of leavening and the bottom part of the cake being too heavy. Chef’s Tip Ensure that the amount of baking soda or powder being used is measured with precision. 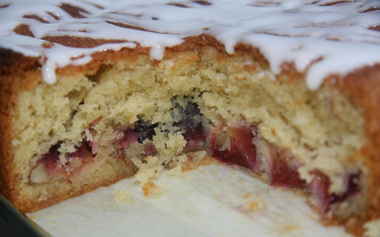 Fault # 8 - Fruit sinking You sprinkle the cake batter with a whole host of fruits, to make the cake more exciting, and they end up sinking to the bottom. Possible Reasons Most often, the fruits being used are denser than the flour of the cake, and they end up sinking to the bottom. It really depends on the kind of fruits you use—cashwenuts are a lot heavier while raisins are not. So you need to take that call. Chef’s Tip What I do in this case, is coat the fruits with flour before adding them. While not a 100% fail-proof method, it works most of the times. 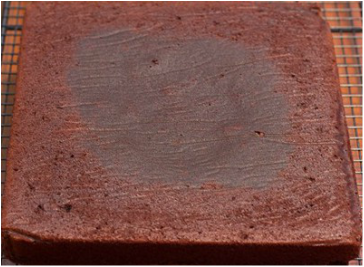 Fault # 10
Wet streak at the base of the cake The entire cake ends up being cooked perfectly, and has a great shape, but you find that the bottom of the cake is still wet and uncooked. Possible Reasons This is an indicator of the fact that the centre of the cake is not cooked. This is usually because the cake tin is filled with batter greater in quantity than its holding capacity. If you add more than what you’re supposed to, the cake definitely won’t cook properly. Chef’s Tip I have a nifty little formula for this. I weigh the cake tin (in grams), and then multiply that number by 4 or 4.5 grams. I then add only that quantity of batter into vessel and keep it for baking. This way I ensure that the oven temperature reaches all parts of the cake evenly. These are some of Chef Avin’s tips, and we hope they help you with your cake baking pursuits. Watch this space for more such tips and tricks, so that your baking process wields gorgeous results. An important Indian spice blend added to dals and curries. Instead of using store bought garam masala (mixed spices), make your own blend at home. You can make it and store it for up to a year, using it to flavour your vegetables and gravies. Preparation Time: 10 minutes Cooking Time: 3 minutes Ingredients . 10/12 big cardamoms/badi elaich • 1/2 cup cumin seeds (Sabut jeera) • 1/2 cup cardamom (elaichi) • 1/4 cup black peppercorns (kalimirch) • 3 tbsp fennel seeds (saunf) • 2 tbsp cloves (laung / lavang) • 10 cinnamon (dalchini) sticks , 50 mm. (2") each • 1/4 cup bay leaves (tejpatta) (10p ) • 2 tbsp caraway seeds (shah jeera) • 1 tbsp nutmeg (jaiphal) powder , optional • 1/2 tbsp dried ginger (soonth) powder Method • Combine all the ingredients, except the dried ginger powder, in a broad non-stick pan and dry roast on a medium flame for a few minutes, while stirring continuously. Let them cool. • Grind them in a mixer to a smooth fine powder. • Transfer the powder into a bowl, add the ginger powder and mix well. • Sieve the powder well and discard the left over coarse powder. • Store the fine powder in an air-tight container use as required. I usually add 1/4 teaspoon garam masala in the dals, sabzis or curries i make for a servings of 2-3. the homemade garam masala powder is so strong that you should not add too much of garam masala in your dishes. it will spoil the taste of the whole food. just a little does the job and balances the aroma, taste and flavors in the food very well. (Some Add whole coriander seeds/sabut dhania - ½ cup to it to..) 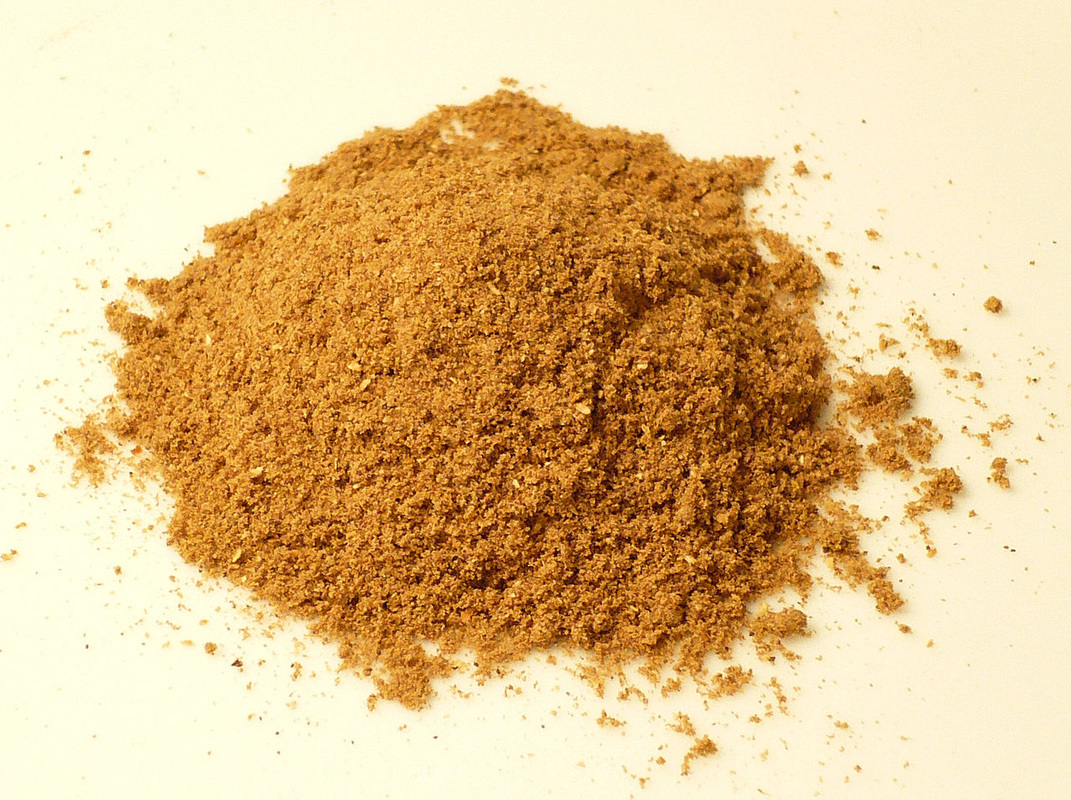 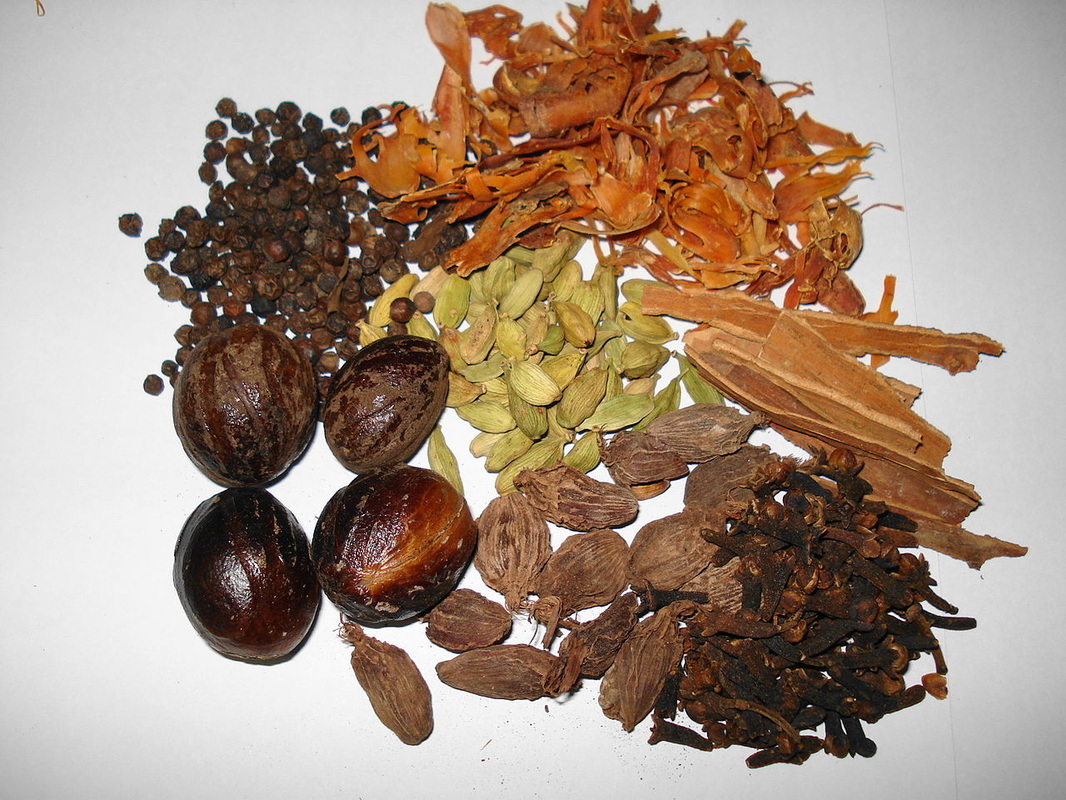 Ingredients: Plain flour- 120 gm Butter- 100 gm ,room temperature Eggs-2 Cocoa powder - 2 tbsp Sugar- 1 cup, granulated Vanilla essence- 1 tsp Baking powder- 1/2 tsp Choco chips - 2 tbsp Method: Beat the butter and sugar until light and fluffy. Add in eggs one at a time. and beat Add in the sifted flour, baking powder and cocoa powder in two additions. Add in the vanilla essence and pour into 6 paper cups. Top with a choco chips Bake in a preheated oven at 180 degree C for 15-20 minutes. Cool in wire rack completely before storing them. u get about 6 cup cakes of standard size 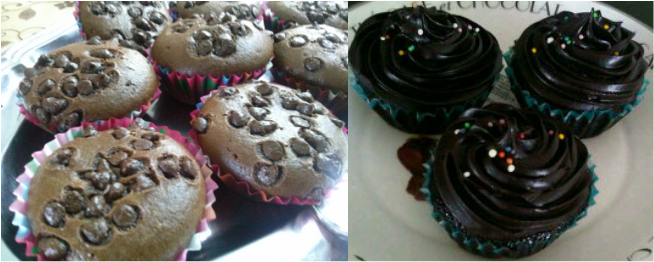 Here's something I found that may be useful to the group - egg substitutions. 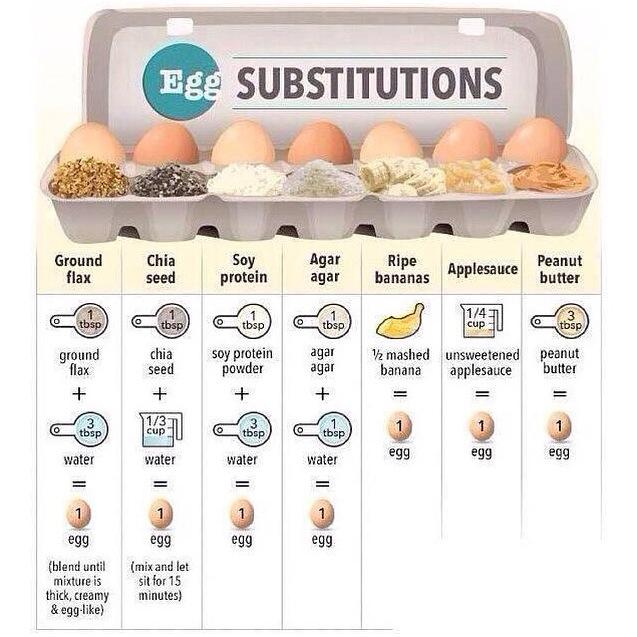  Ingredients:
2 ready made pizza bases TOMATO SAUCE 200 gm tomatoes - blanched (put in hot water and peeled) and chopped finely 1/4 cup ready-made tomato puree, 4 flakes garlic - crushed, 1 tbsp oil 1 bay leaf, Small ½ tsp vinegar, Salt & freshly ground pepper to taste, 1 tsp dried oregano TOPPING 150 gm mozzarella - grated (1½ cups), 2 tbsp olive oil Method: 1. For tomato sauce, Heat 1 tbsp oil in a pan. Add garlic. Stir and add all other ingredients. Boil. Simmer on low heat for 10 minutes, stirring occasionally until it is reduced in quantity and thick enough to spread. 2. Spoon the prepared tomato sauce over each pizza base, leaving ½" all around the edges. 3. Brush the edges with olive oil. Sprinkle grated cheese on top of the pizza. Drop few drops of sauce over the pizza. 4. Drizzle 1 tbsp olive oil on the cheese and bake in a pre-heated oven on the wire rack (not tray) at 180°C for 7 to 8 minutes or until the base is evenly browned and the cheese gets melted. 5. Repeat with the remaining ingredients to make another pizza. Cut into Pieces to serve. Tip : If u don't have Oven can try this on Tava. Heat the Tava and keep another tava or Pan on it (Double Tava), And slow flame put the pizza cover with Lid , cook till its done. |
AuthorBakeology Archives
April 2016
Categories
All
|
 RSS Feed
